1. On the primary node, create a staging directory. For example: [testasm] /home/oracle >mkdir -p /u02/stage
2. Create the same exact path on one of the standby hosts: [testdb] /home/oracle >mkdir -p /u02/stage
3. On the primary node, connect to the primary database and create a PFILE from the
SPFILE in the staging directory. For example: SQL> create pfile='/u02/stage/inittestasm.ora' from spfile;
File created.
SQL>
4. If you want to use dataguard broker, add the standby redo log:ALTER DATABASE ADD STANDBY LOGFILE GROUP 4 ('+DATA/testasm/ONLINELOG/REDO04A.LOG','+DATA/testasm/ONLINELOG/REDO04B.LOG') SIZE 128M reuse;
ALTER DATABASE ADD STANDBY LOGFILE GROUP 5 ('+DATA/testasm/ONLINELOG/REDO05A.LOG','+DATA/testasm/ONLINELOG/REDO05B.LOG') SIZE 128M reuse;
ALTER DATABASE ADD STANDBY LOGFILE GROUP 6 ('+DATA/testasm/ONLINELOG/REDO06A.LOG','+DATA/testasm/ONLINELOG/REDO06B.LOG') SIZE 128M reuse;
ALTER DATABASE ADD STANDBY LOGFILE GROUP 7 ('+DATA/testasm/ONLINELOG/REDO07A.LOG','+DATA/testasm/ONLINELOG/REDO07B.LOG') SIZE 128M reuse;
5. On the primary node, perform an RMAN backup of the primary database that places the backup pieces into the staging directory. For example: [testasm] /u01/app/oracle/product/11.2.0/dbs >rman target /RMAN>backup device type disk format '/u02/stage/%U' database plus archivelog;
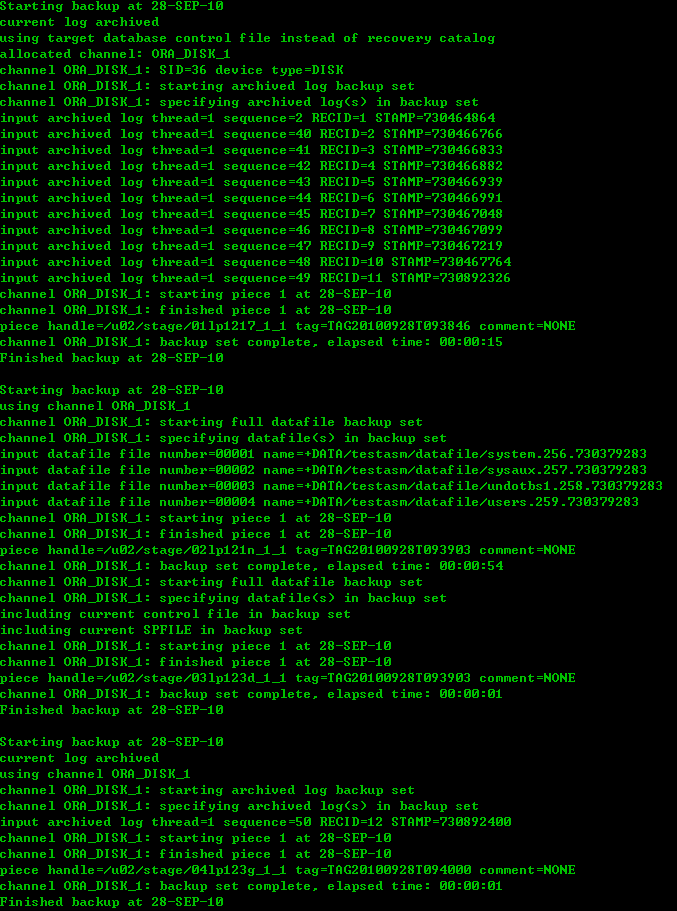
RMAN> backup device type disk format '/u02/stage/%U' current controlfile for standby;
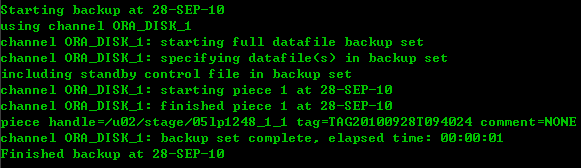
Or: alter database create standby controlfile as '/u02/stage/standby.ctl';
6. Copy the contents of the staging directory on the RAC primary node to the standby node on which the staging directory was created on in step 2.
Task 2: Configure Oracle Net Services on the Standby
1. listener.ora:
| |||||||||||||||||||||||||||||||||||||||||||||
2. tnsnames.ora:
|
3. Start the standby listeners on all standby hosts. srvctl start listener
Or
lsnrctl reload testasm
Task 3: Create the Standby Instances and Database
1. To enable secure transmission of redo data, make sure the primary and standby databases use a password file, and make sure the password for the SYS user is identical on every system. For example:$ cd $ORACLE_HOME/dbs
$ orapwd file=orapwtestasm password=********
2. Copy and rename the primary database PFILE from the staging area:[testdb] mkdir -p /u01/app/oracle/admin/testasm/pfile
[testdb] cd /u01/app/oracle/admin/testasm/pfile
[testdb] /u01/app/oracle/admin/testasm/pfile >cp /u02/stage/inittestasm.ora ./init.ora
[testdb] /u01/app/oracle/admin/testasm/pfile >ln -s /u01/app/oracle/admin/testasm/pfile/init.ora $ORACLE_HOME/dbs/inittestasm.ora
| 3. Modify the initialization parameter files, add the following: Primary |
| db_unique_name='PRIMARY' |
| Log_archive_dest_1='LOCATION=+DATA/testasm/archivelog' |
| Log_archive_dest_state_1=ENABLE |
| standby_file_management =auto |
| FAL_Client= 'to_primary' |
| FAL_Server='to_standby' |
| Log_archive_dest_2='Service=to_standby lgwr ASYNC VALID_FOR=(ALL_LOGFILES, PRIMARY_ROLE)' |
| Log_archive_dest_state_2=ENABLE |
| Standby |
| db_unique_name='STANDBY' |
| Log_archive_dest_1='LOCATION=+DATA/testasm/archivelog' |
| Log_archive_dest_state_1=ENABLE |
| standby_file_management =auto |
| FAL_Client='to_standby' |
| FAL_Server= 'to_primary' |
| Log_archive_dest_2='Service=to_primary VALID_FOR=(ONLINE_LOGFILES,PRIMARY_ROLE)' |
| Log_archive_dest_state_2=ENABLE |
4. Connect to ASMCMD on one standby host and create a directory within the DB_DSK_GRP disk group that has the same name as the DB_UNIQUE_NAME of the standby database. [+ASM] /home/oracle >asmcmd
ASMCMD> cd data
ASMCMD> mkdir TESTASM
ASMCMD> cd testasm
ASMCMD> mkdir ARCHIVELOG
ASMCMD>mkdir ONLINELOG
ASMCMD>mkdir PARAMETERFILE
ASMCMD>mkdir TEMPFILE
ASMCMD> mkdir CONTROLFILE
ASMCMD>mkdir DATAFILE
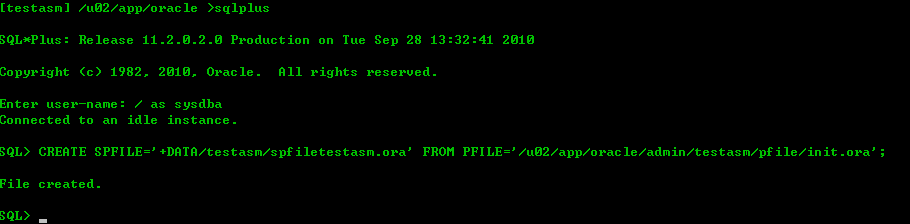
5. Connect to the standby database on one standby host, with the standby in the IDLE state, and create an SPFILE in the standby DB_DSK_GRP disk group:
SQL> CREATE SPFILE='+DATA/testasm/spfiletestasm.ora' FROM PFILE='/u01/app/oracle/admin/testasm/pfile/init.ora';
6. If you want to use spfile, in the $ORACLE_HOME/dbs directory on standby host, create a PFILE that is named initoracle_sid.ora that contains a pointer to the SPFILE. For example:
[testasm] /u02/app/oracle/product/11.2.0/dbs > $ cd $ORACLE_HOME/dbs
[testasm] /u02/app/oracle/product/11.2.0/dbs > $ echo "SPFILE=’+DATA/testasm/spfiletestasm.ora’" > inittestasm.ora
7. Create the dump directories on all standby hosts as referenced in the standby initialization parameter file. For example:[testasm] /u02/app/oracle/diag/rdbms/testasm/testasm >mkdir -p $ORACLE_BASE/admin/testasm/adump
[testasm] /u02/app/oracle/product/11.2.0/dbs >mkdir -p $ORACLE_BASE/diag/rdbms/testasm/testasm/trace
[testasm] /u02/app/oracle/product/11.2.0/dbs >mkdir -p $ORACLE_BASE/diag/rdbms/testasm/testasm/alert
[testasm] /u02/app/oracle/product/11.2.0/dbs >mkdir -p $ORACLE_BASE/diag/rdbms/testasm/testasm/cdump
8. After setting up the appropriate environment variables on standby host, such as ORACLE_SID, ORACLE_HOME, and PATH, start the standby database instance on the standby host that has the staging directory alter , without mounting the control file.
SQL> STARTUP NOMOUNT
9. From the standby host where the standby instance was just started, duplicate the primary database as a standby into the ASM disk group. For example:
$ rman target sys/********@to_primary auxiliary /
RMAN> duplicate target database for standby;
If you’re not using spfile, remember to check the new control file name using asmcmd command and make changes in the init.ora.
If you got error like “RMAN-05001: auxiliary file name +DATA/testasm/users01.dbf conflicts with a file used by the target database”, you can user the following command:duplicate target database for standby dorecover nofilenamecheck;
Or add *.db_file_name_convert and log_file_name_convert in the init.ora.
10. register the standby database and the database instances with the Oracle Cluster Registry (OCR) using the Server Control (SRVCTL) utility:srvctl add database -d testasm -n testasm -o $ORACLE_HOME -r PHYSICAL_STANDBY -a DATA
Srvctl command: srvctl add database -d <db_unique_name> -o <oracle_home> [-m <domain_name>] [-p <spfile>] [-r {PRIMARY | PHYSICAL_STANDBY | LOGICAL_STANDBY | SNAPSHOT_STANDBY}] [-s <start_options>] [-t <stop_options>] [-n <db_name>] [-y {AUTOMATIC | MANUAL}] [-a "<diskgroup_list>"]
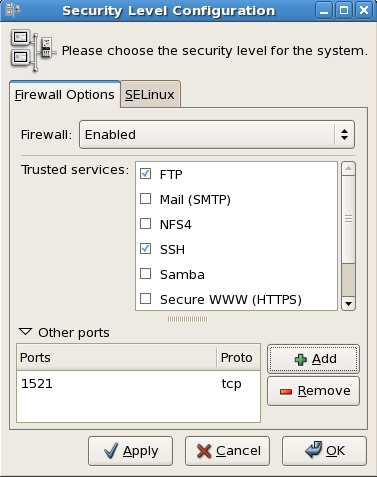
11. Enable port 1521 on both server:
Task 4: Verify Data Guard Configuration
- Try to connect to the database:
From Primary host:sqlplus sys/****@testasm as sysdba –> This will connect to primary database
sqlplus sys/****@to_standby as sysdba –> This will connect to standby database from primary host
From Standby host
sqlplus sys/****@testasm as sysdba –> This will connect to standby database
sqlplus sys/****@to_primary as sysdba –> This will connect to primary database from standby host
- Bring standby database up:alter database recover managed standby database disconnect from session;ALTER DATABASE RECOVER MANAGED STANDBY DATABASE CANCEL;ALTER DATABASE MOUNT STANDBY DATABASE;
- Check switch over status on both nodes:
Primary:
SQL> select switchover_status from v$database;
SWITCHOVER_STATUS
--------------------
TO STANDBYALTER DATABASE SET STANDBY DATABASE TO MAXIMIZE availability
Standby:
SQL> select switchover_status from v$database;
SWITCHOVER_STATUS
--------------------
TO PRIMARY
SQL> select switchover_status from v$database;
SWITCHOVER_STATUS
--------------------
TO PRIMARY
(If primary database has not been switched first, the SWITCHOVER_STATUS on standby database will be “Not Allowed”)
- You can view the logs in v$dataguard_status if there’s any problems:select message from v$dataguard_status;
- Log switch in primary instance and check the log shipping:
SQL>ALTER SYSTEM SWITCH LOGFILE;
SQL>SELECT SEQUENCE#,APPLIED FROM V$ARCHIVED_LOG ORDER BY SEQUENCE#; - Quick Switchover Steps
1. Initiate the switchover on the primary database
ALTER DATABASE COMMIT TO SWITCHOVER TO PHYSICAL STANDBY WITH SESSION SHUTDOWN;2. After step 1 finishes, Switch the original physical standby db to primary role:
Open another prompt and connect to SQLPLUS:
ALTER DATABASE COMMIT TO SWITCHOVER TO PRIMARY;3. Immediately after issuing command in step 2, shut down and restart the former primary instance:
SQL>SHUTDOWN IMMEDIATE
SQL>STARTUP MOUNT;
SQL> recover managed standby database disconnect;4. After step 3 completes, start the old standby database:
SQL>SHUTDOWN IMMEDIATE;
SQL>STARTUP;
5. On the new primary database, perform a SWITCH LOGFILE to start sending redo data to the standby database:
SQL>ALTER SYSTEM SWITCH LOGFILE; - ORA-16072 a minimum of one standby database destination is required Instance:
Startup Mount
ALTER DATABASE SET STANDBY DATABASE TO MAXIMIZE PERFORMANCE;
shutdown immediate
startup
ALTER DATABASE SET STANDBY DATABASE TO MAXIMIZE PERFORMANCE;
shutdown immediate
startup
No comments:
Post a Comment