11gR2 Rac install on Centos 6.2 without Oracle ASMLib
Oracle ASMlib is available for linux prior to OL6 or RedHat 6. However, starting from 6, you can only use asmlib for UEK kernel.
On Linux, the built in udev is definitely a better solution to handle persistent device naming and permissions.
Without ASMLib, you don't need to worry about the raw disks everytime when there's a kernel update.
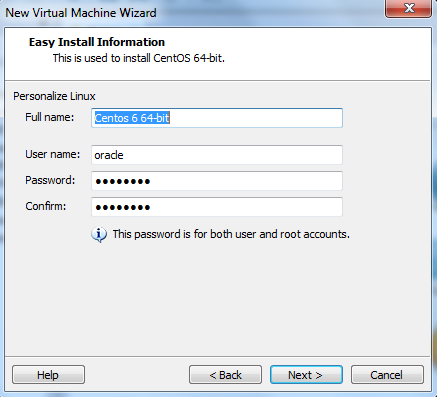
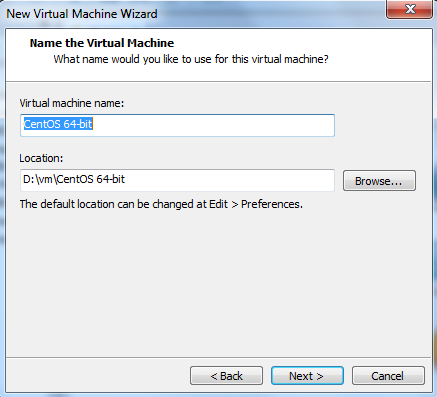
Create VM:


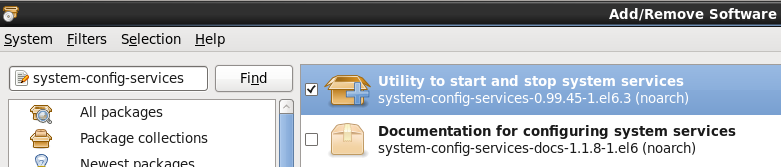
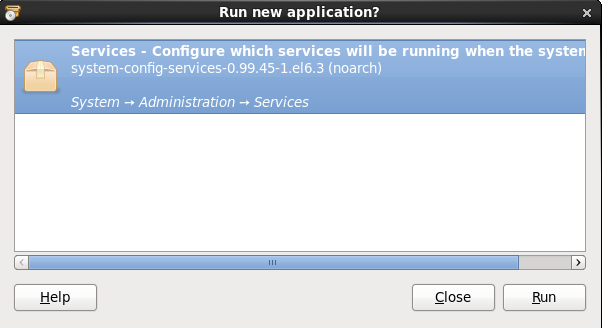
Install system-config-services:

Setup Korn Shell:

Add Group dba.
Change login shell for user oracle to /bin/ksh.
Add group dba for user oracle.
Assign dba as primary group for user oracle.
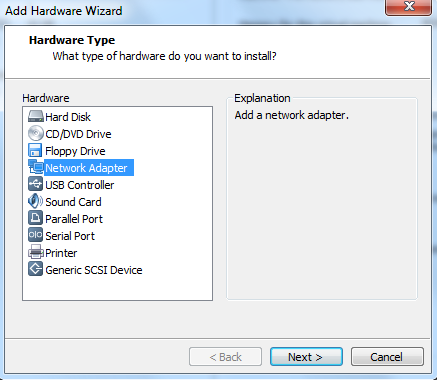
Shutdown and add a network card (Host Only):

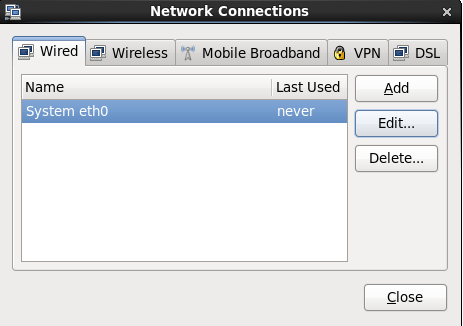
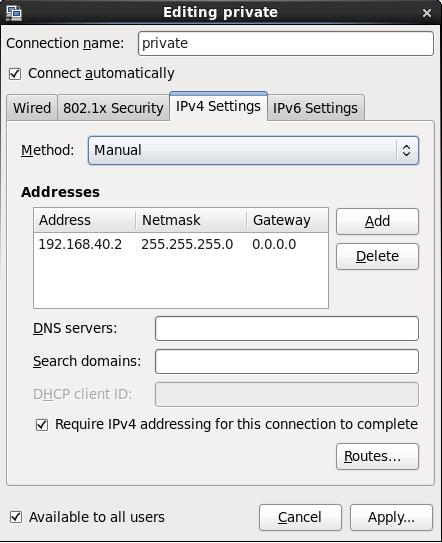
Setup network connection:


Add the following lines in /etc/hosts
# Public
192.168.96.3 rac1.localdomain rac1
192.168.96.4 rac2.localdomain rac2
#Private
192.168.40.2 rac1-priv.localdomain rac1-priv
192.168.40.3 rac2-priv.localdomain rac2-priv
#Virtual
192.168.96.111 rac1-vip.localdomain rac1-vip
192.168.96.112 rac2-vip.localdomain rac2-vip
# SCAN
192.168.96.201 rac-scan.localdomain rac-scan
Change the hostname[root@localhost Desktop]# hostname rac1
[root@localhost Desktop]# cat /etc/sysconfig/network
NETWORKING=yes
HOSTNAME=rac1
Add or amend the following lines to the "/etc/sysctl.conf" file.
fs.aio-max-nr = 1048576
fs.file-max = 6815744
kernel.shmall = 2097152
kernel.shmmax =2007738368
kernel.shmmni = 4096
# semaphores: semmsl, semmns, semopm, semmni
kernel.sem = 250 32000 100 128
net.ipv4.ip_local_port_range = 9000 65500
net.core.rmem_default=262144
net.core.rmem_max=4194304
net.core.wmem_default=262144
net.core.wmem_max=1048586
Run the following command to change the current kernel parameters.
/sbin/sysctl -p
Add the following lines to the "/etc/security/limits.conf" file.
oracle soft nproc 2047
oracle hard nproc 16384
oracle soft nofile 1024
oracle hard nofile 65536
Add the following lines to the "/etc/pam.d/login" file, if it does not already exist.
session required pam_limits.so
Disable secure linux by editing the "/etc/selinux/config" file, making sure the SELINUX flag is set as follows.
SELINUX=disabled
Alternatively, this alteration can be done using the GUI tool (System > Administration > Security Level and Firewall). Click on the SELinux tab and disable the feature.
To install Oracle 10gChanged /etc/redhat-release to reflect: ‘Red Hat Enterprise Linux ES release 4 (Nahant Update 3)’
Installed libXp.s0.6: ‘yum install libXp.so.6′ (as root of course).
The following packages are required for EM 11g
yum install compat-db-*
yum install compat-libstdc++-296*
yum install rng-utils-2*
yum install setarch-2*
yum install tunctl-1.5-3* (Redhat kernel-utils-2.4*)
The following packages are required for Grid 11g
yum install compat-libstdc++-33*
yum install elfutils-libelf-devel-*
yum install gcc-c++-4.*
yum install libaio-devel-0.*
yum install unixODBC-2.*
yum install unixODBC-devel-2.*
yum install compat-libcap1*
package cvuqdisk-1.0.9-1 from /stage/cvu/cv/remenv/cvuqdisk-1.0.9-1.rpm
Enable Telnet:
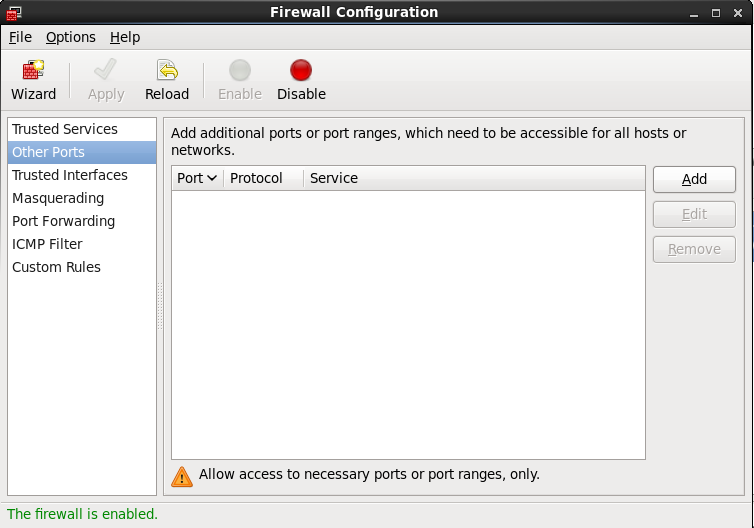
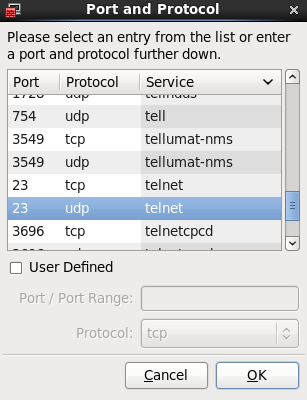
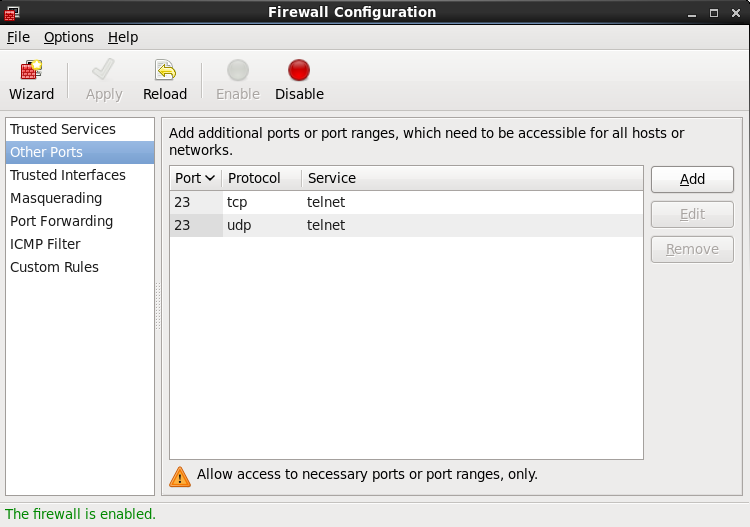
Install telnet-server package and enable telnet in firewall options:

Enable xinetd and Telnet service:
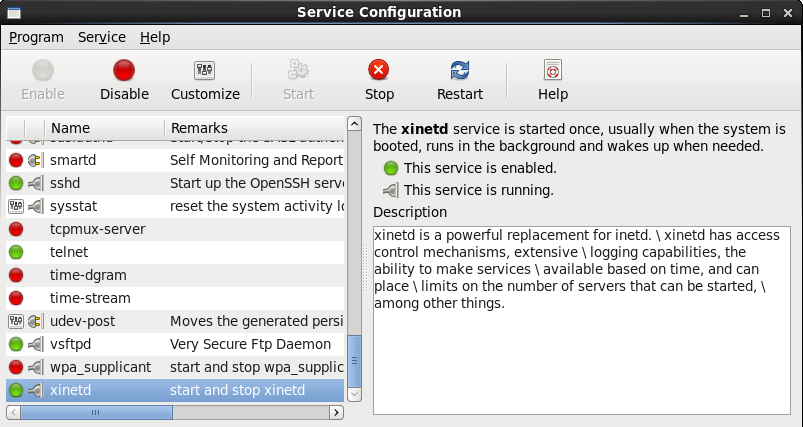
Or Enable telnet on start-up:chkconfig telnet on
Enable Telnet in firewall and restart xinetd service:

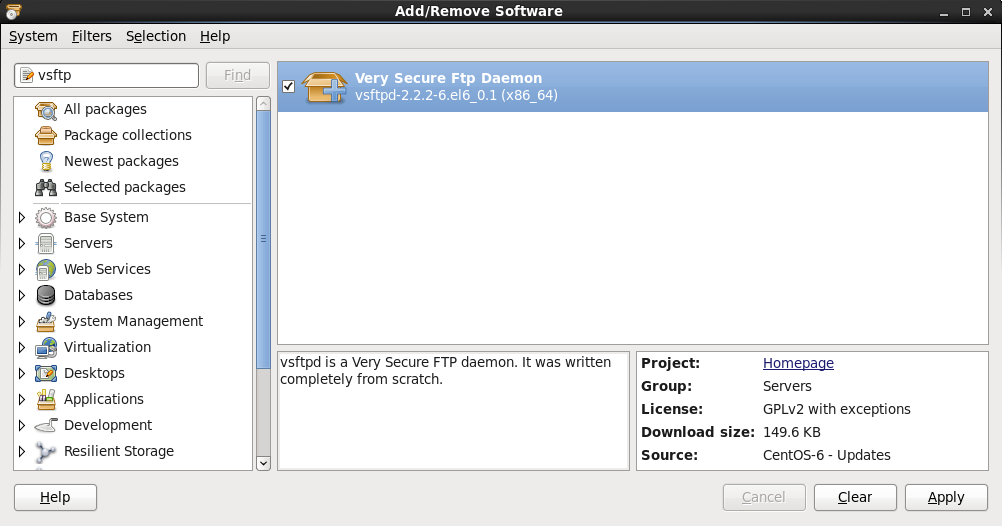
Enable Ftp:
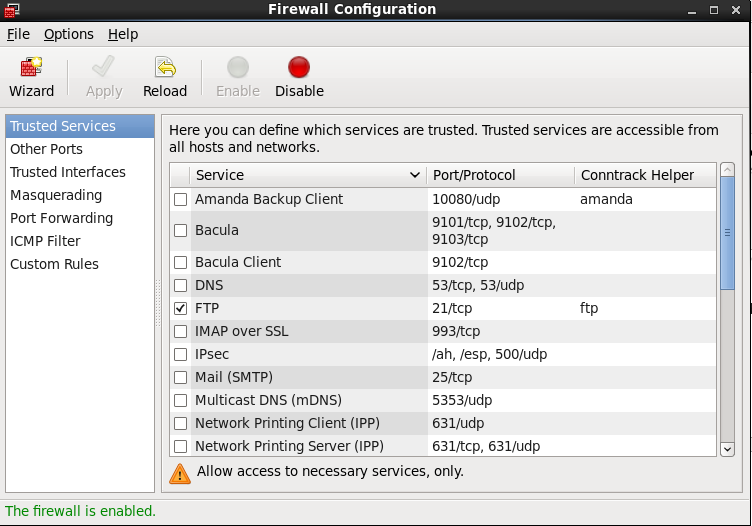
Install vsftpd-2.2.2-6-el6 package and enable FTP in firewall options:
Enable and Start vsftpd:
Or Enable vsftp on start-up:chkconfig vsftpd on
Check SELinux setting: getsebool -a|grep ftp
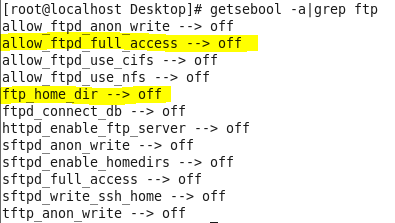
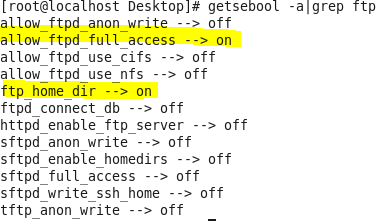
Enable allow_ftpd_full_access and ftp_home_dir:
setsebool -P allow_ftpd_full_access 1
setsebool -P ftp_home_dir 1
Deconfigure NTP so Oracle Cluster Time Synchronization Service (ctssd) can synchronize the times of the RAC nodes:
# service ntpd stop
Shutting down ntpd: [ OK ]
# chkconfig ntpd off
# mv /etc/ntp.conf /etc/ntp.conf.org
# rm /var/run/ntpd.pid
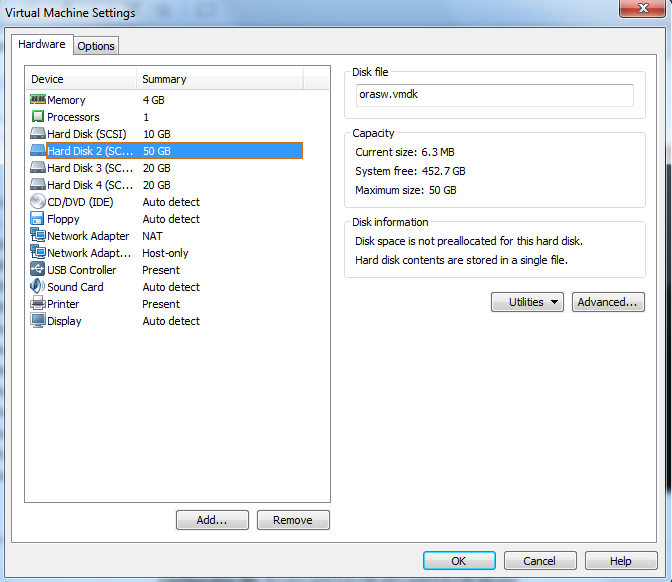
Shutdown OS and add 3 more disks, 50G for software, another 20G each for Oracle 10G database and 11G database, SCSI 0:1,0:2,0:3 (You may only need the disk for software only if you only need to test RAC and no 10G database):
Change the contents of .vmx:
disk.locking = "FALSE"
diskLib.dataCacheMaxSize = "0"
diskLib.dataCacheMaxReadAheadSize = "0"
diskLib.dataCacheMinReadAheadSize = "0"
diskLib.dataCachePageSize = "4096"
diskLib.maxUnsyncedWrites = "0"
scsi0.sharedBus = "VIRTUAL" ###If you want the disk be able to be managed by VM
snapshot, this parameter shouldn’t be set, and disk type
shouldn’t be independent###
scsi0:1.writeThrough = "TRUE"
scsi0:2.writeThrough = "TRUE"
scsi0:3.writeThrough = "TRUE"
scsi0:1.redo = ""
scsi0:2.redo = ""
scsi0:3.redo = ""
scsi0:1.deviceType = "disk"
scsi0:2.deviceType = "disk"
scsi0:3.deviceType = "disk"
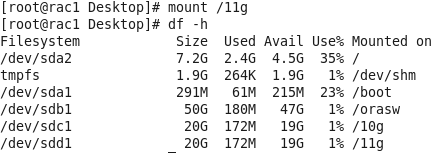
Create an ext4 filesystem:
[root@localhost Desktop]# fdisk /dev/sdb

[root@localhost Desktop]# mkfs.ext4 /dev/sdb1
[root@localhost ~]# mkdir /orasw
[root@localhost ~]# e2label /dev/sdb1 /orasw
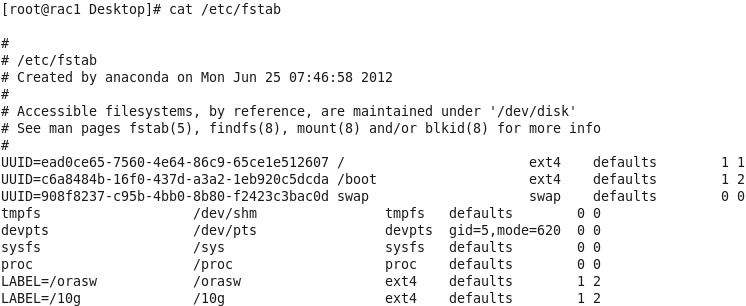
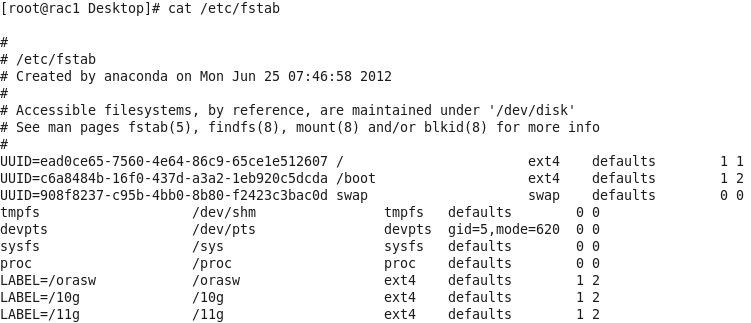
[root@localhost ~]# vi /etc/fstab
[root@localhost Desktop]# cat /etc/fstab
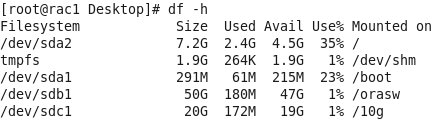
[root@localhost Desktop]# df -h
[root@localhost Desktop]# chown -R oracle:dba /orasw
[root@localhost Desktop]# fdisk /dev/sdc
[root@localhost Desktop]# mkfs.ext4 /dev/sdc1

[root@localhost Desktop]# mkdir /10g
[root@localhost Desktop]# e2label /dev/sdc1 /10g
[root@localhost Desktop]# mount /10g
[root@localhost Desktop]# chown -R oracle:dba /10g
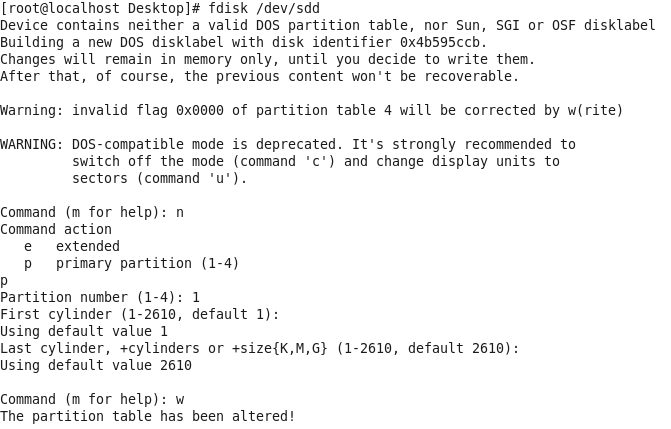
[root@localhost Desktop]# fdisk /dev/sdd
[root@localhost Desktop]# mkdir /11g
[root@localhost Desktop]# mkfs.ext4 /dev/sdd1
[root@localhost Desktop]# e2label /dev/sdd1 /11g
[root@localhost Desktop]# mount /11g
Change tmp folder:
mkdir /orasw/tmp
chmod 777 /orasw/tmp
Edit .profile, add the following contents:
export TMP=/orasw/tmp
export TMPDIR=/orasw/tmp
Enable port 1521 in firewall:

Create Shared Disks
- Add 5 disks, SCSI, Allocate all disk space now (Important! Or you’ll have ASM disk failure when creating disk groups on second node), Independent Persistent mode Virtual device node from SCSI 1:1 to SCSI 1:5. (If you want those disks be manageable by snapshots, you can choose the default mode – not Independent Persistent)
(If
Shared disk configure fails, RAC will be not installed on the second
node, and you’ll see error message under
$CRS_HOME/log/diag/asm/+asm/+asm2/trace/alert_+asm2.log.
To bypass it, you can edit the setting of the second VM node, add disk, using existing disk created by node 1.)
- Edit the contents of the “RAC1\RAC1.vmx" file using a text editor, making sure the following entries are present. Some of the tries will already be present, some will not.
scsi1.present = "TRUE"
scsi1.virtualDev = "lsilogic"
scsi1.sharedBus = "VIRTUAL" ###If you want the disk be able to be managed by VM
snapshot, this parameter shouldn’t be set, and disk type
shouldn’t be independent###
scsi1:1.present = "TRUE"
scsi1:1.fileName = "D:\vm\rac.11gR2.shared\asm1.vmdk"
scsi1:2.present = "TRUE"
scsi1:2.fileName = "D:\vm\rac.11gR2.shared\asm2.vmdk"
scsi1:3.present = "TRUE"
scsi1:3.fileName = "D:\vm\rac.11gR2.shared\asm3.vmdk"
scsi1:4.present = "TRUE"
scsi1:4.fileName = "D:\vm\rac.11gR2.shared\asm4.vmdk"
scsi1:5.present = "TRUE"
scsi1:5.fileName = "D:\vm\rac.11gR2.shared\asm5.vmdk"
scsi1:1.writeThrough = "TRUE"
scsi1:2.writeThrough = "TRUE"
scsi1:3.writeThrough = "TRUE"
scsi1:4.writeThrough = "TRUE"
scsi1:5.writeThrough = "TRUE"
scsi1:1.redo = ""
scsi1:2.redo = ""
scsi1:3.redo = ""
scsi1:4.redo = ""
scsi1:5.redo = ""
scsi1:1.deviceType = "plainDisk"
scsi1:2.deviceType = "plainDisk"
scsi1:3.deviceType = "plainDisk"
scsi1:4.deviceType = "plainDisk"
scsi1:5.deviceType = "plainDisk"
scsi1:1.mode = "independent-persistent"
scsi1:2.mode = "independent-persistent"
scsi1:3.mode = "independent-persistent"
scsi1:4.mode = "independent-persistent"
scsi1:5.mode = "independent-persistent"
- Start the RAC1 virtual. When the server has started, log in as the root user so you can partition the disks.
Create a Raw disk using udev:
- Configure SCSI devices as trusted devices (white listed), by editing the /etc/scsi_id.config file and adding options=-g to the file.
- Create partition for all disks for ASM:
- Obtain the unique device identifiers for each disk:
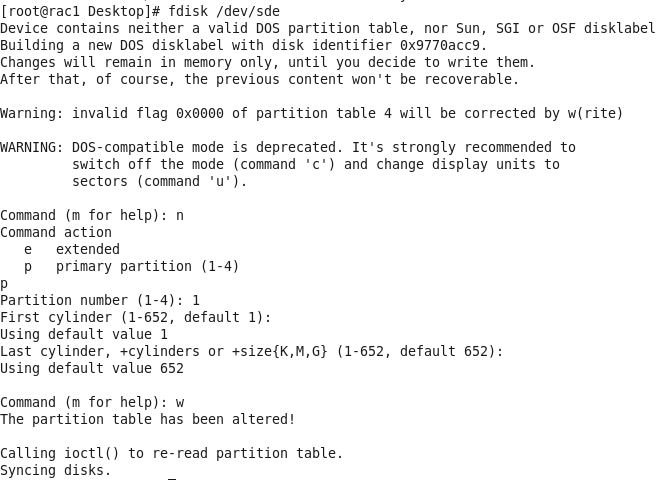
/sbin/scsi_id -g -u -d /dev/sde
/sbin/scsi_id -g -u -d /dev/sdf
/sbin/scsi_id -g -u -d /dev/sdg
/sbin/scsi_id -g -u -d /dev/sdh
/sbin/scsi_id -g -u -d /dev/sdi
- Create
a UDEV rules file /etc/udev/rules.d/99-oracle-asmdevices.rules for the
Oracle ASM devices, with the identifiers obtained. setting permissions
to 0660 for the installation owner and the group whose members are
administrators of the Oracle Grid Infrastructure software. You’ll need
to copy /etc/udev/rules.d/99-oracle-asmdevices.rules to all other nodes
later.

KERNEL=="sd?1",
BUS=="scsi", PROGRAM=="/sbin/scsi_id -g -u -d /dev/$parent",
RESULT=="36000c29d53d2819ca34f3ec009c0e088", NAME="ocr-disk1",
OWNER="oracle", GROUP="dba", MODE="0660"
KERNEL=="sd?1",
BUS=="scsi", PROGRAM=="/sbin/scsi_id -g -u -d /dev/$parent",
RESULT=="36000c29265e492ec626a34767e271b4e", NAME="voting-disk1",
OWNER="oracle", GROUP="dba", MODE="0660"
KERNEL=="sd?1",
BUS=="scsi", PROGRAM=="/sbin/scsi_id -g -u -d /dev/$parent",
RESULT=="36000c29ea96091990cf88cc1a03e629f", NAME="asm-disk1",
OWNER="oracle", GROUP="dba", MODE="0660"
KERNEL=="sd?1",
BUS=="scsi", PROGRAM=="/sbin/scsi_id -g -u -d /dev/$parent",
RESULT=="36000c296d71d33d14bd49b82cce252bf", NAME="asm-disk2",
OWNER="oracle", GROUP="dba", MODE="0660"
KERNEL=="sd?1",
BUS=="scsi", PROGRAM=="/sbin/scsi_id -g -u -d /dev/$parent",
RESULT=="36000c298a5d862c2c62309c20f01c317", NAME="asm-disk3",
OWNER="oracle", GROUP="dba", MODE="0660"
- Load updated block device partition tables on all member nodes of the cluster, using /sbin/partprobe devicename. You must do this as root.
[root@rac1 Desktop]# /sbin/partprobe /dev/sde1
[root@rac1 Desktop]# /sbin/partprobe /dev/sdf1
[root@rac1 Desktop]# /sbin/partprobe /dev/sdg1
[root@rac1 Desktop]# /sbin/partprobe /dev/sdh1
[root@rac1 Desktop]# /sbin/partprobe /dev/sdi1
- Reload rules:
udevadm control --reload-rules
- To check information:
udevadm info --path=/sys/block/sde --query=all
- To test rules:
udevadm test /sys/block/sde
- Restart the UDEV service: /sbin/start_udev
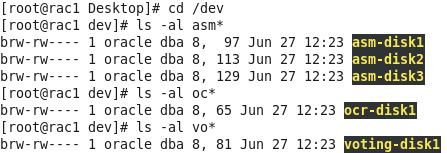
- Check Ownership and Permissions
Check the disks are now available with the "asm-disk*" alias and the correct ownership and permissions.
Clone the Virtual Machine to second node rac2, change the display name in vmx file, after started, modify network setting, public address from 192.168.96.3 to 192.168.96.4 and private from 192.168.40.2 to 192.168.40.3, hostname from rac1 to rac2.
Make sure the network interface name are same for all nodes, or you’ll get error:

You can also add DEVICE=<name>, where name is the network card name, in file /etc/sysconfig/network-scripts/ifcfg-<interface-name>, to make sure it matches rac1(Check result from ifconfig -a).
Start first node and make sure rac 1 and rac2 can both ping all the public and private IP addresses using the following commands.
ping -c 3 rac1
ping -c 3 rac1-priv
ping -c 3 rac2
ping -c 3 rac2-priv
Prior to 11gR2 we would probably use the "runcluvfy.sh" utility in the clusterware root directory to check the prerequisites have been met. If you are intending to configure SSH connectivity using the installer this check should be omitted as it will always fail. If you want to setup SSH connectivity manually, then once it is done you can run the "runcluvfy.sh" with the following command:
runcluvfy.sh stage -pre crsinst -n rac1,rac2 -verbose
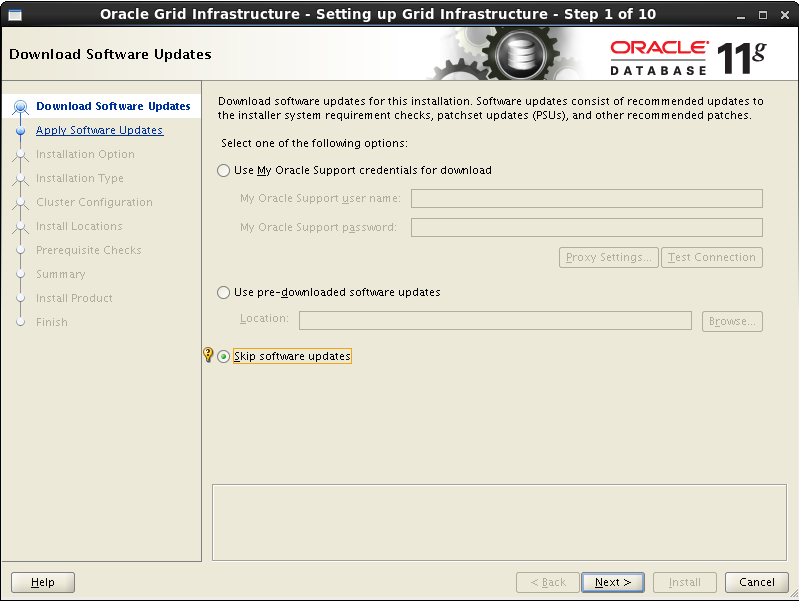
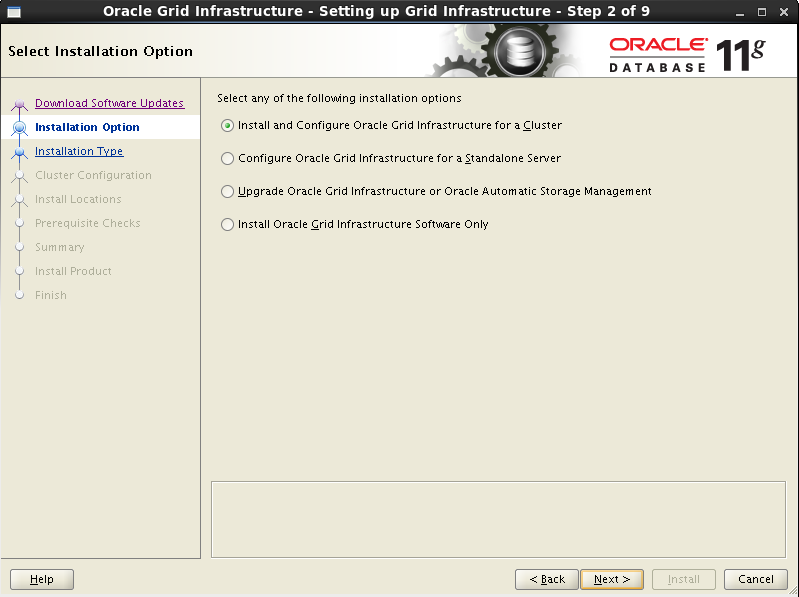
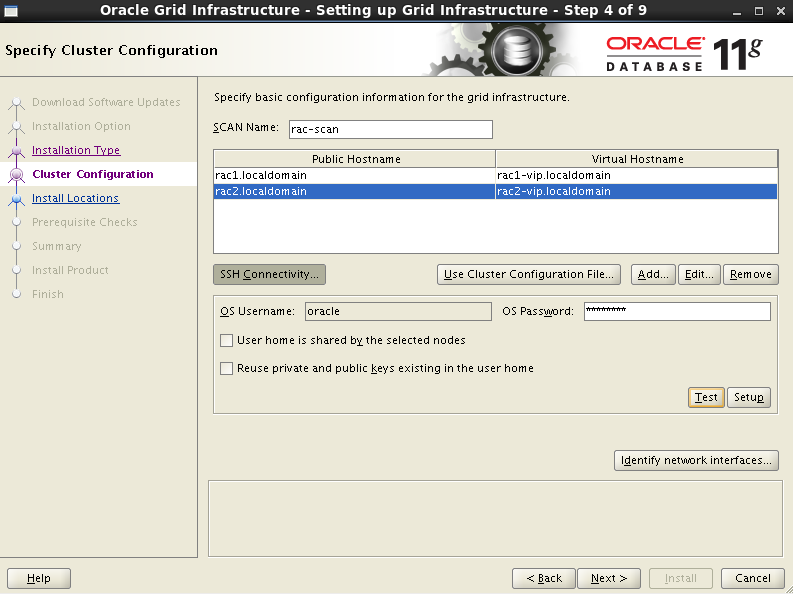
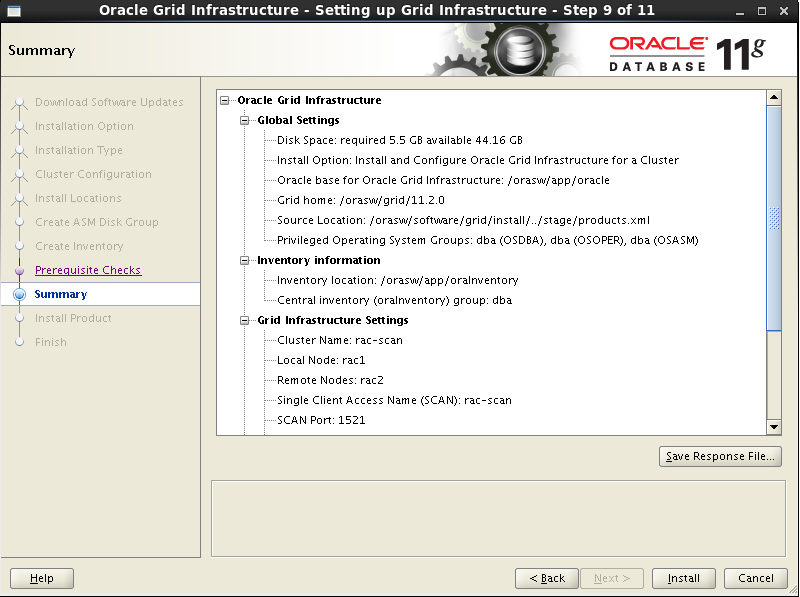
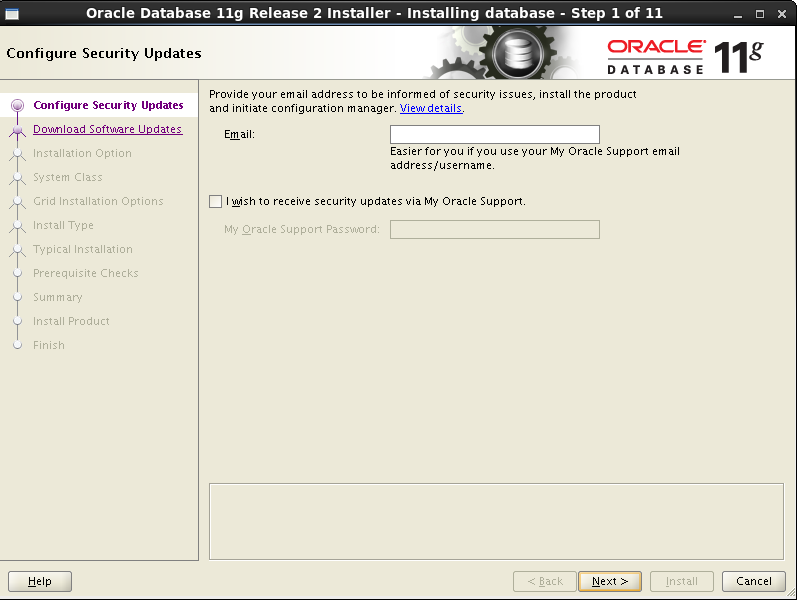
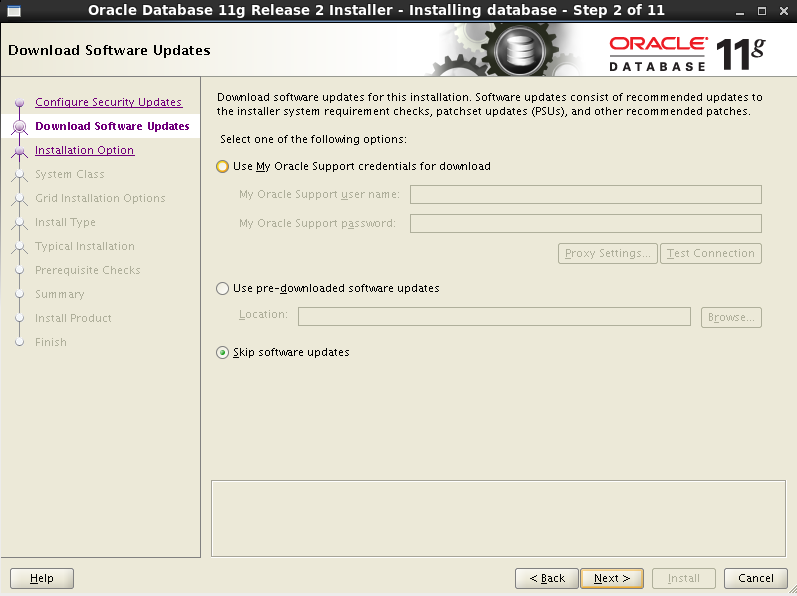
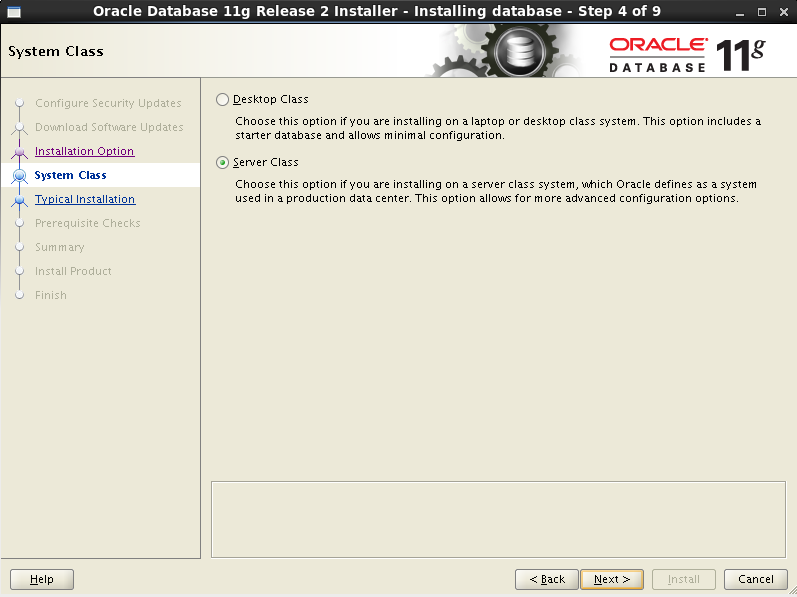
Install the Grid Infrastructure


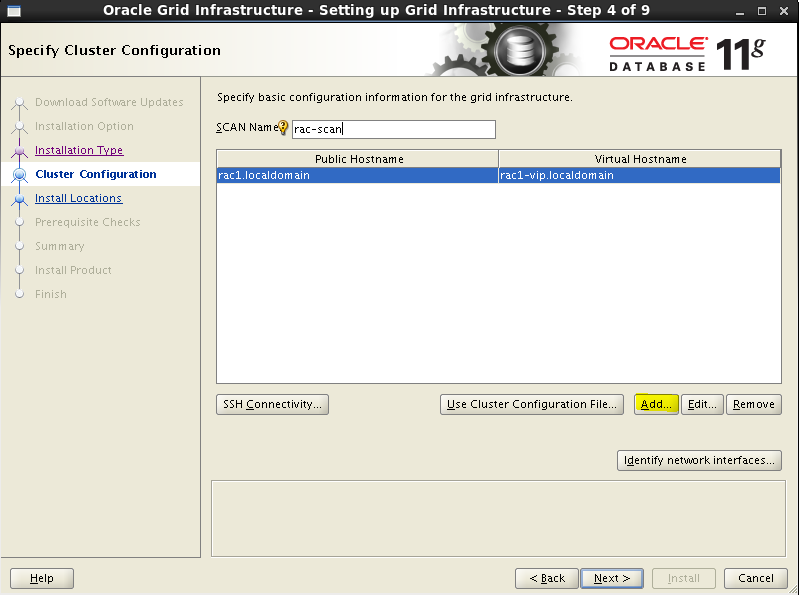

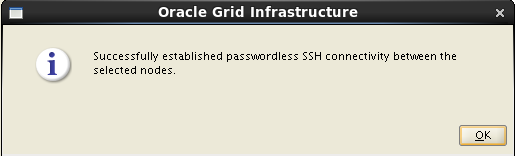
Click SSH Connectivity, put in the password, click Setup to setup SSH between nodes:

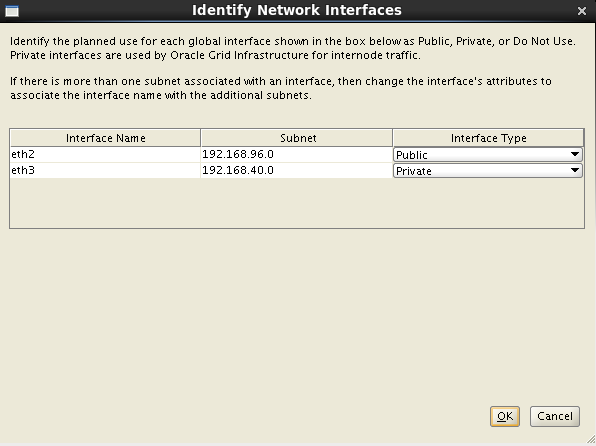
Click the "Identify network interfaces..." button and check the public and private networks are specified correctly. Once you are happy with them, click the "OK" button and the "Next" button on the previous screen.
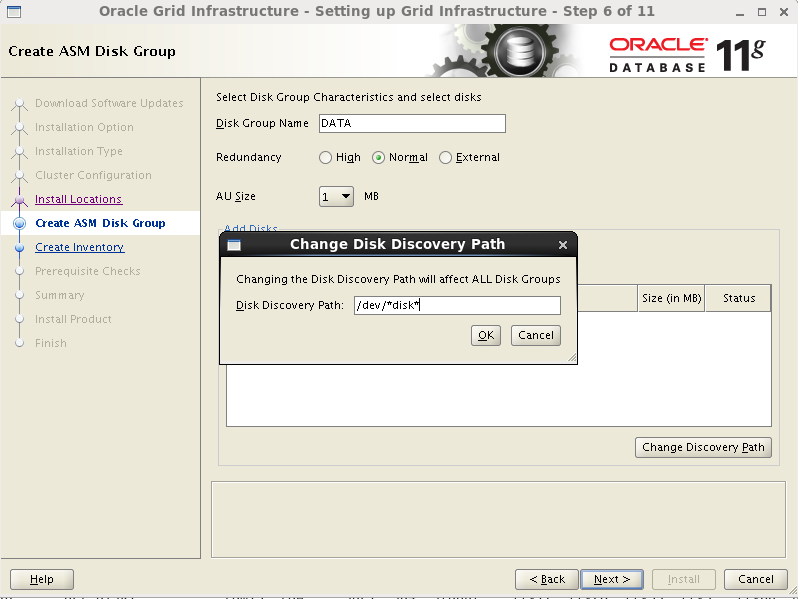
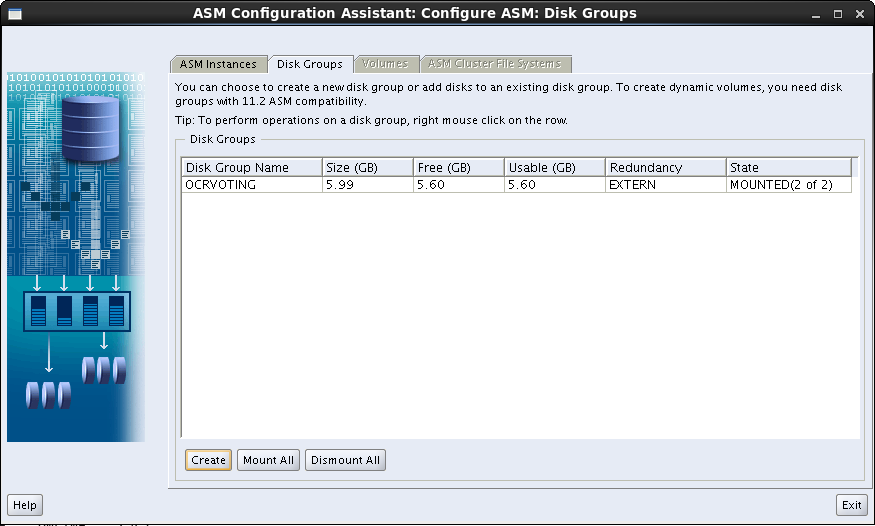
On Create ASM Disk Group screen, click Change Discovery Path button, to add the Raw disks created earlier:
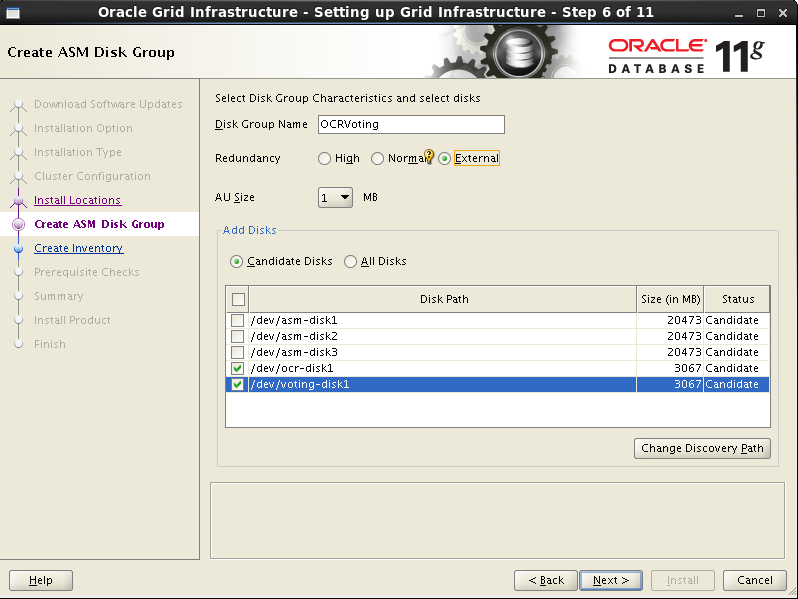
We only use ocr-disk1 and voting-disk1 for grid installation, Set the redundancy to "External". We’ll create data disks for database afterwards.

If missing package cvuqdisk-1.0.9-1, it’s under /stage/cvu/cv/remenv/cvuqdisk-1.0.9-1.rpm
Install it for all nodes by running: rpm -iv cvuqdisk-1.0.9-1.rpm:


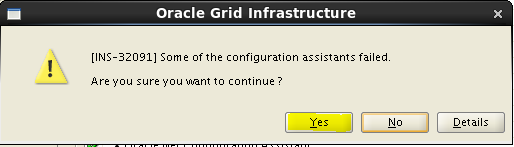
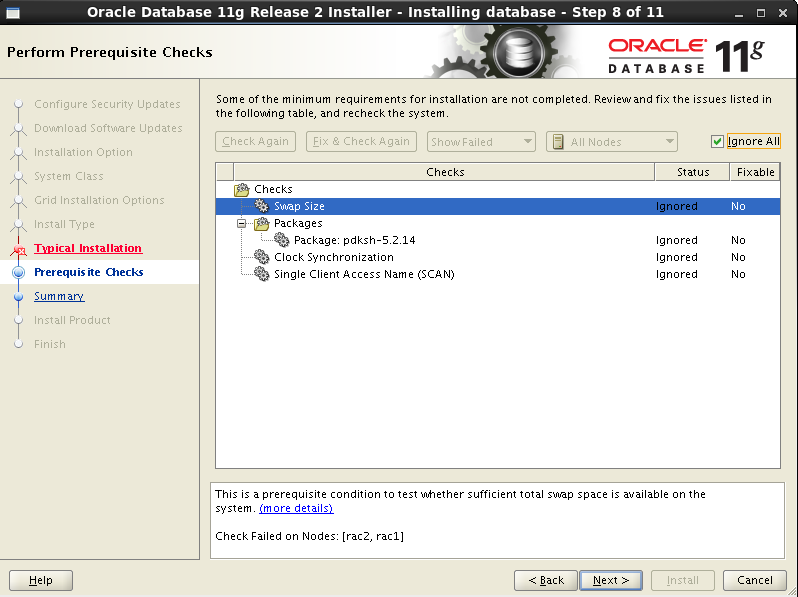
For device checks for ASM error:
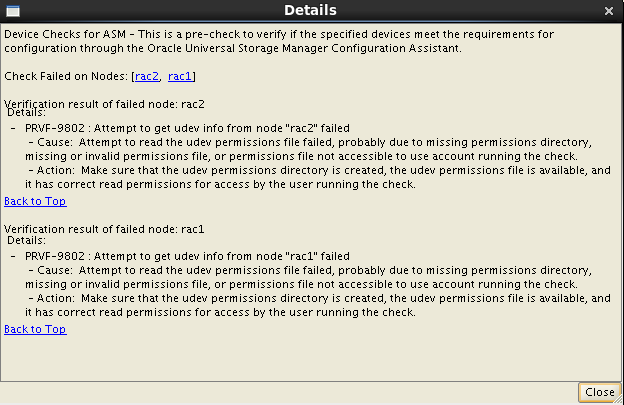
Bug 8726128: Ignore the failure in checking Udev attributes on RHEL4/OEL4. If Udev attribute validation is the only reported problem, then the installation should be considered successful.
Bug 10357213: ASM DEVICE CHECK FAILS WITH PRVF-5184 DURING GI INSTALL and can be ignored. This will have no impact on the installation.

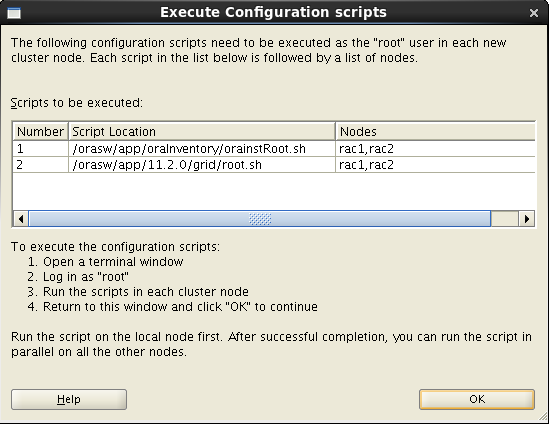
Run scripts by root for all nodes:

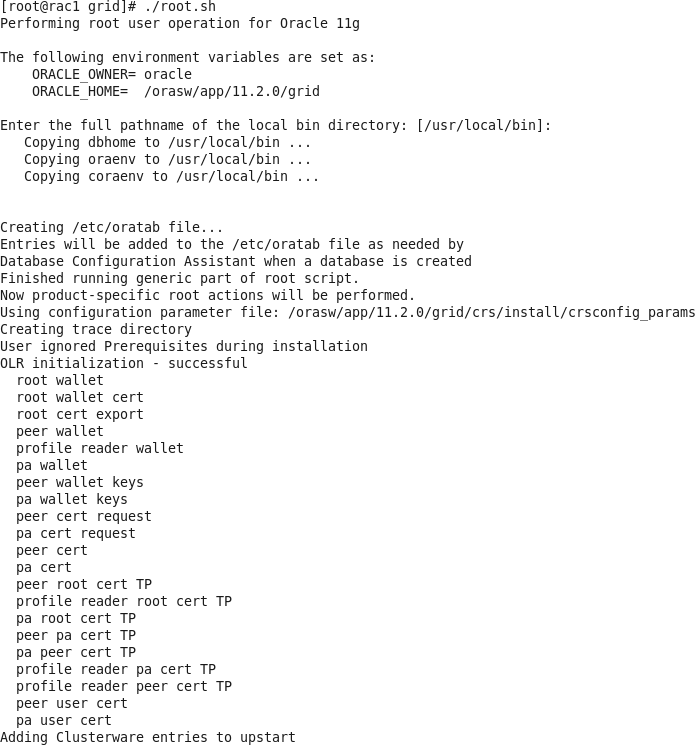


If you have error: ORA-29780: unable to connect to GPnP daemon [CLSGPNP_ERR], uset ORA_CRS_HOME and run root.sh again:

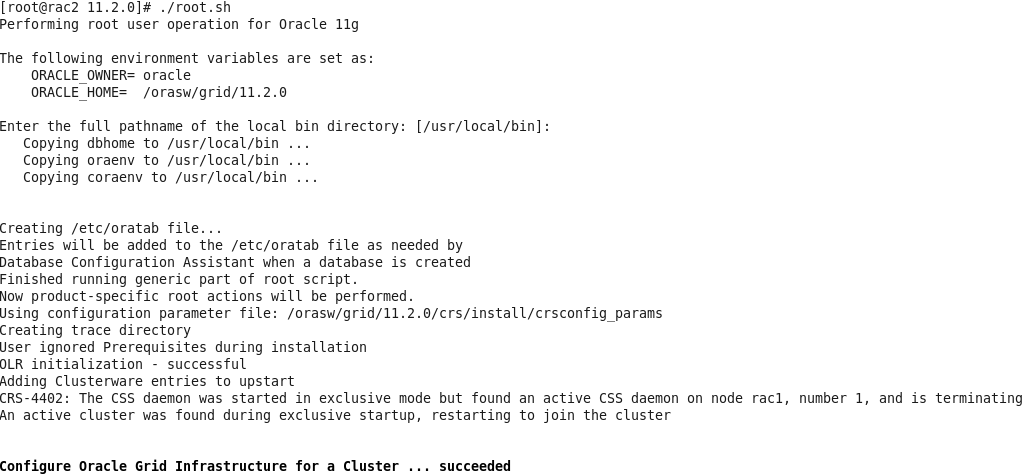
Root.sh on second node:
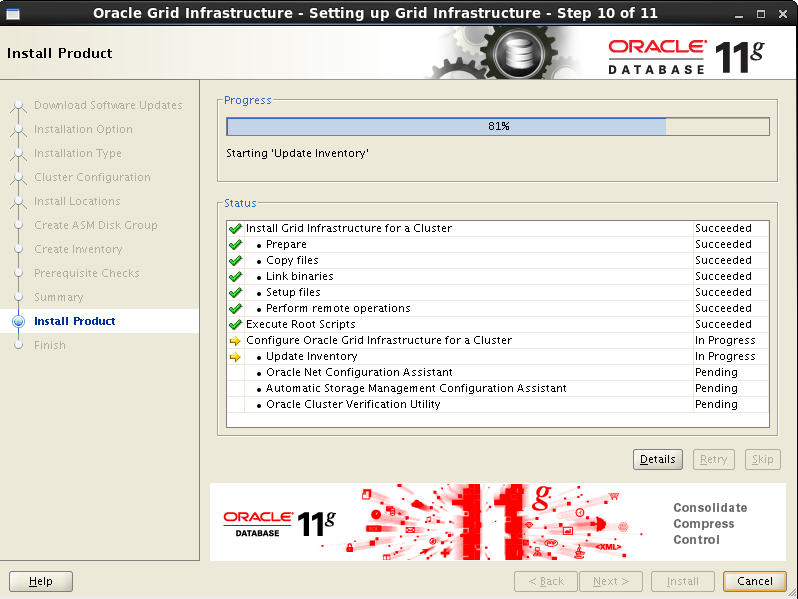
Click ok:
For the error [INS-20802] at step Oracle Cluster Verification Utility, because I didn't setup DNS for the SCAN feature but added it to the host file. For this reason this error can safely be ignored.

You can see the result at $ORA_CRS_HOME/cv/log/cvutrace.log.0:

Click Next


Done for grid install:

$ . oraenv
ORACLE_SID = [oracle] ? +ASM1
The Oracle base has been set to /orasw/app/oracle
$ crsctl status resource -t
--------------------------------------------------------------------------------
NAME TARGET STATE SERVER STATE_DETAILS
--------------------------------------------------------------------------------
Local Resources
--------------------------------------------------------------------------------
ora.LISTENER.lsnr
ONLINE ONLINE rac1
ONLINE ONLINE rac2
ora.OCRVOTING.dg
ONLINE ONLINE rac1
ONLINE ONLINE rac2
ora.asm
ONLINE ONLINE rac1 Started
ONLINE ONLINE rac2 Started
ora.gsd
OFFLINE OFFLINE rac1
OFFLINE OFFLINE rac2
ora.net1.network
ONLINE ONLINE rac1
ONLINE ONLINE rac2
ora.ons
ONLINE ONLINE rac1
ONLINE ONLINE rac2
--------------------------------------------------------------------------------
Cluster Resources
--------------------------------------------------------------------------------
ora.LISTENER_SCAN1.lsnr
1 ONLINE ONLINE rac1
ora.cvu
1 ONLINE ONLINE rac1
ora.oc4j
1 ONLINE ONLINE rac1
ora.rac1.vip
1 ONLINE ONLINE rac1
ora.rac2.vip
1 ONLINE ONLINE rac2
ora.scan1.vip
1 ONLINE ONLINE rac1
$ crsctl status resource -t -init
--------------------------------------------------------------------------------
NAME TARGET STATE SERVER STATE_DETAILS
--------------------------------------------------------------------------------
Cluster Resources
--------------------------------------------------------------------------------
ora.asm
1 ONLINE ONLINE rac1 Started
ora.cluster_interconnect.haip
1 ONLINE ONLINE rac1
ora.crf
1 ONLINE ONLINE rac1
ora.crsd
1 ONLINE ONLINE rac1
ora.cssd
1 ONLINE ONLINE rac1
ora.cssdmonitor
1 ONLINE ONLINE rac1
ora.ctssd
1 ONLINE ONLINE rac1 ACTIVE:0
ora.diskmon
1 OFFLINE OFFLINE
ora.evmd
1 ONLINE ONLINE rac1
ora.gipcd
1 ONLINE ONLINE rac1
ora.gpnpd
1 ONLINE ONLINE rac1
ora.mdnsd
1 ONLINE ONLINE rac1
Please Note:
1) The ora.gsd resource is offline by default. This resource must be enabled when you have oracle9i databases running in your environment.
2) The ora.diskmon resource is offline by default when the installation is not on Exadata.
To check Clock Synchronization service:
cluvfy comp clocksync -n all
$ cluvfy comp clocksync -n all
Verifying Clock Synchronization across the cluster nodes
Checking if Clusterware is installed on all nodes...
Check of Clusterware install passed
Checking if CTSS Resource is running on all nodes...
CTSS resource check passed
Querying CTSS for time offset on all nodes...
Query of CTSS for time offset passed
Check CTSS state started...
CTSS is in Active state. Proceeding with check of clock time offsets on all nodes...
Check of clock time offsets passed
Oracle Cluster Time Synchronization Services check passed
Verification of Clock Synchronization across the cluster nodes was successful.
If NTP is enabled, Clock Synchronization will be switched to NTP and the service is going to be “observer mode”.
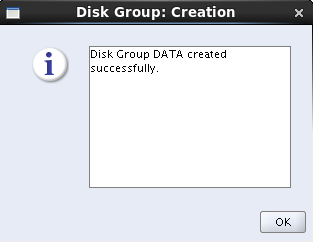
Create new data diskgroup using asmca:


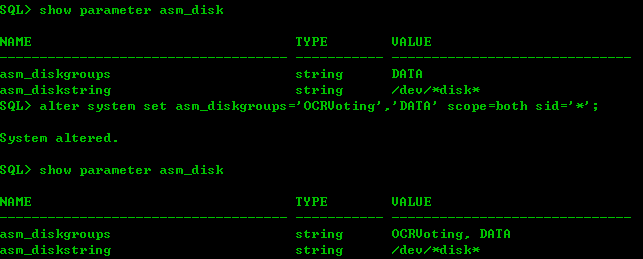
To Check diskgroups: select name,state from v$asm_diskgroup;
To check members of diskgroups: SELECT name, header_status, path FROM V$ASM_DISK;
Make sure diskgroup and members are mounted for all nodes.
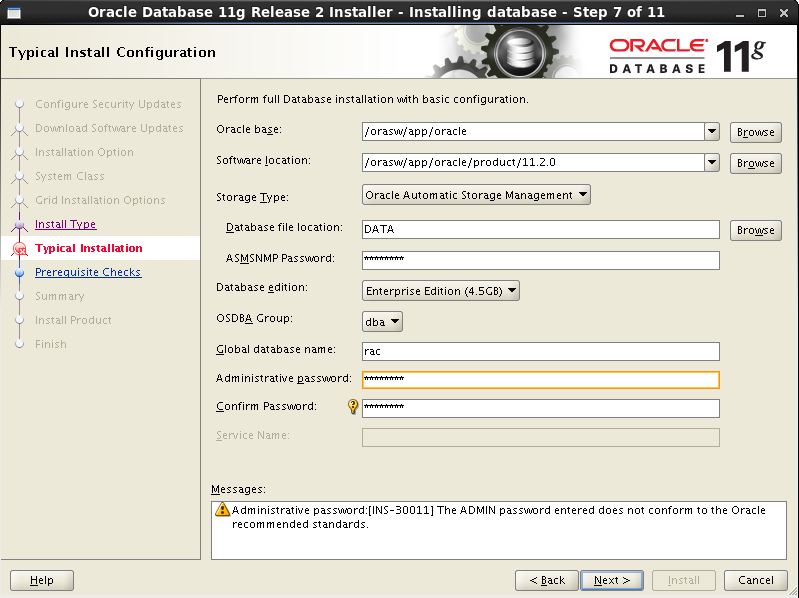
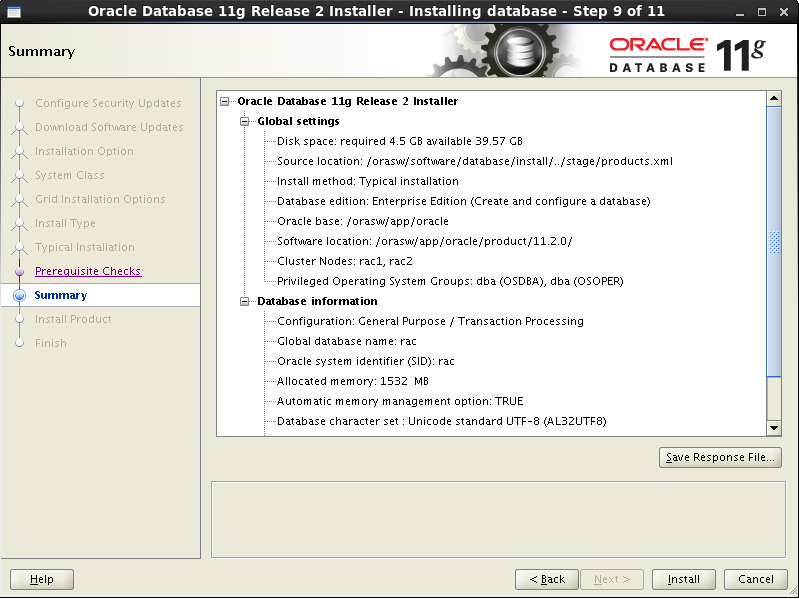
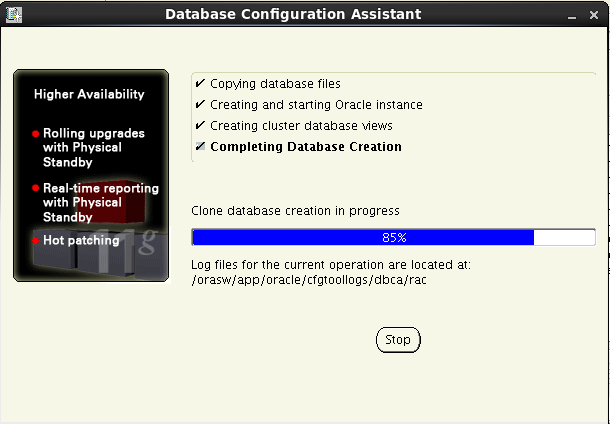
Install database:


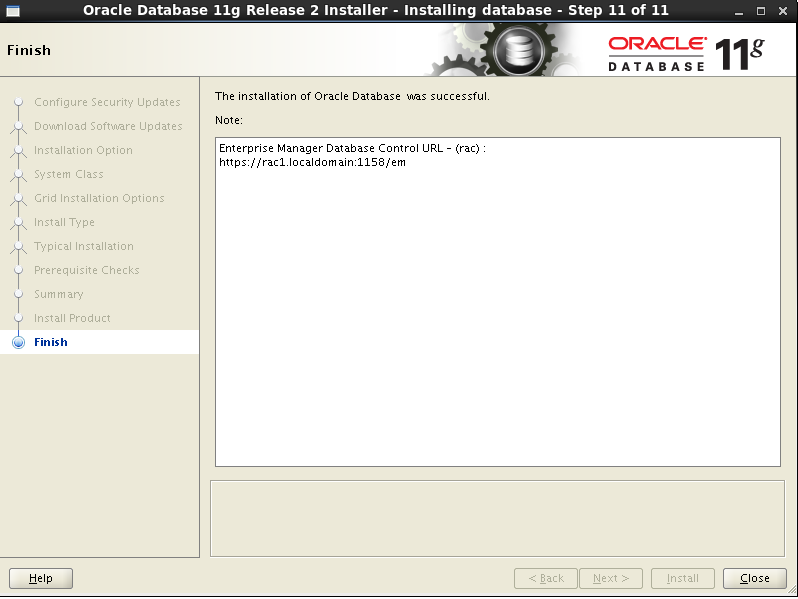

Check if all instances are running:
$ srvctl status database -d rac
Instance rac1 is running on node rac1
Instance rac2 is running on node rac2
Once the database is created, edit the /etc/oratab file and add the instance.
First node (rac1):
rac1:/orasw/app/oracle/product/11.2.0:N
Second node (rac2):
rac2:/orasw/app/oracle/product/11.2.0:N
Add the following into .profile:export ORACLE_BASE=/orasw/app/oracle
export ORA_CRS_HOME=/orasw/app/11.2.0/grid
export ORACLE_HOME=$ORACLE_BASE/product/11.2.0
export ORACLE_SID=testdb
export ORACLE_TERM=xterm
export PATH=/usr/kerberos/sbin:/usr/kerberos/bin:/usr/local/sbin:/usr/local/bin:/sbin:/bin:/usr/sbin:/usr/bin:/usr/X11R6/bin:/root/bin:$ORACLE_HOME/bin:$ORA_CRS_HOME/bin
export LD_LIBRARY_PATH=$ORACLE_HOME/lib:/lib:/usr/lib
export CLASSPATH=$ORACLE_HOME/JRE:$ORACLE_HOME/jlib:$ORACLE_HOME/rdbms/jlib
export EDITOR=vi
export PS1='[$ORACLE_SID] $PWD >'
. oraenv
if [ $USER = "oracle" ]; then
if [ $SHELL = "/bin/ksh" ]; then
## see SR: http://kb.dbatoolz.com/tp/2965.etc-profile57_ulimit_pipe_is_read_only.html
##ulimit -p 16384
ulimit -u 16384
ulimit -n 65536
else
ulimit -u 16384 -n 65536
fi
umask 022
fi
Done!
No comments:
Post a Comment